Welcome to The Foodie Geek’s FFXIV Raid Guides!
Patch 4.3 is out- the new trial fight looks pretty fun, and as expected, the new songs that came with it are quite the eargasm! In terms of difficulty though, it looks like this is easier than Shinryu, maybe even easier or at par with Byakko. Well, a fun fight is still a fun fight and the more people who can clear this, the more we can farm for those doggos. So without further ado, here’s the guide for this patch’s Extreme Trial fight!
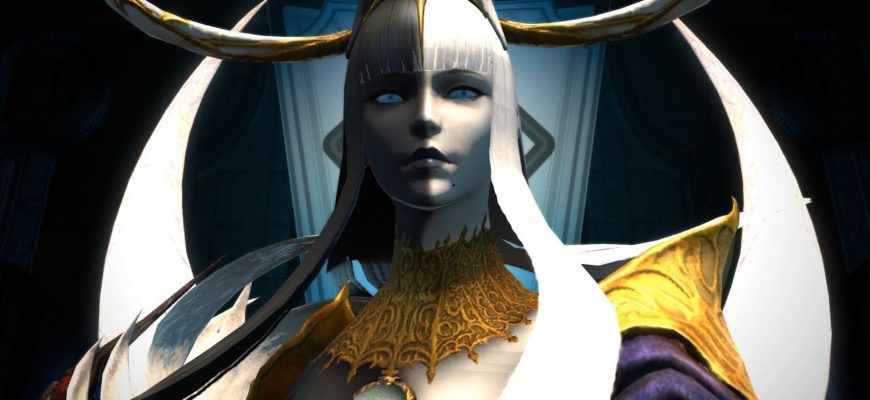
You are currently at Tsukuyomi (Extreme) / The Minstrel’s Ballad: Tsukuyomi’s Pain
Links to other guides:
- Shinryu (Extreme) / The Minstrel’s Ballad: Shinryu’s Domain
- Byakko (Extreme) / The Jade Stoa
- Sigmascape O5S | O6S | O7S | O8S Kefka | O8S God Kefka
- Rathalos (Extreme) / The Great Hunt
- Suzaku (Extreme) / Hell’s Kier
- Alphascape O9S | O10S | O11S | O12S
- Seiryu (Extreme) / The Wreath of Snakes
Watch the video guide:
Mechanics & Rotation
PHASE 1
Reprimand – raid-wide AoE attack (0:43 of video)
Nightfall – equips either lance or gun and attacks with it
- If gun (0:54 of video), she will say “Beg for mercy” and does a shareable straight-line AoE to a random target- everyone stack together
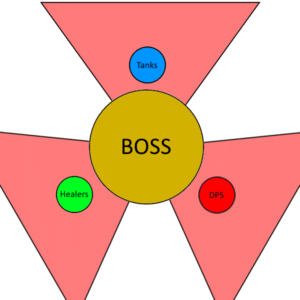
- If lance (1:15 of video), she will say “Your end is near” and will do three consecutive conal attacks to one random tank, one random DPS and then one random healer. Players of the same class should stack together but away from other classes e.g. tanks on north, DPS on south, healers on east
Nightfall
Note: no two same Nightfalls can happen. It will always be one kind and then the other
Reprimand
Nightbloom – raid-wide AoE attack (1:48 of video)
PHASE 2
DPS Check– multiple sets of adds will appear. Those tethered to Yotsuyu can’t be aggroed and will attack her, raising her Suffering bar. They key here is to kill the adds while preventing the Suffering bar to reach 100. You may kill the tethered adds first for efficiency (2:16 of video)
1st set of adds – 2 from north (tethered), 3 from east (melee) and 3 from west (ranged). Bring the melee to the ranged and burn them down with AoEs and then proceed to kill the tethered adds
2nd set of adds – 1 from the NE (tethered), 3 from southwest (melee) and 3 from northwest (ranged). Do the same as you did in the 1st set
3rd set of adds – Zenos will appear, then knockback and stun everyone for a few seconds. He does heavy raid-wide AoEs every few seconds. Kill him ASAP
Nightbloom
PHASE 3
Supreme Selenomancy – splits the arena in two halves- dark and light. Standing in either side will give you stacks for that side every five seconds, while standing on the opposite side will reset your stacks to one for that color. They key here is to not reach five stacks by alternating between light and dark. But watch out- after casting Supreme Selenomancy, you’ll be immediately given four stacks of a color so be aware and step right away to the opposite side (4:26 of video)
Moon Donuts – two donut AoEs will spawn during Supreme Selenomancy in one side. If it happens to be on the side you’ll be going to, keep aware and avoid the AoEs (4:34 of video)
Note: after Moon Donuts, one of the colors will contract, and subsequently, the other will expand. Tank the boss between the two colors for easy handling of stacks. Depending on where the dominant color is, your new relative north / tanking position is either the true east or true west
Nightfall
Meteor – the off tank, one random healer and one random DPS will be marked to drop a huge AoE attack. Each marked player should bait their AoEs in their assigned class positions e.g. healer at opposite side of boss (east or west), off tank at north, DPS at south. Tank and DPS must make sure they are dropping their meteors on the smaller side of the circle for a later mechanic. Everyone then proceed to the safe zone back at the boss before the AoEs explode. (5:02 of video)

Note: healer doesn’t have to run and place his AoE on the edge. It can be put somewhat midway because the AoE isn’t that big and there will still be space for the safe zone. Also, watch out for your stacks. Don’t stay in one color for too long and make sure to reset when you can
Midnight Rain – the arena will be completely covered with the dominant color, giving you no more chance to reset stacks (5:14 of video)
Moon Donuts x2
Moon Donuts x1 – it’s important to go inside this one!
Meteor Part 2 – the meteors that dropped before will explode again so go back to the previous safe spot right after the last Moon Donut. This time, the meteors that landed on the smaller side before will leave a puddle of that same color, making it the only place for you to swap colors. The meteors are also colored for easier visual reference. Run towards there to reset your stacks before you die (5:30 of video)
Perilune / Antitwilight – raid-wide AoE that requires you to be on a certain floor color after cast. If Perilune, you must stand on light. If Antitwilight, you must stand on dark. Floor mechanic will be removed after this attack (5:39 of video)
Reprimand
Zashiki Asobi 1 – spawns two sets of fans that will cover 2/3 of the arena (north or south), then another set that will cover the remaining 1/3. What you do here is stay first on the safe 1/3 area, then proceed to the 2/3 area when it is safe. Keep aware as while the first set of fans are going off, the boss will already be casting Nightfall (6:01 of video)
Nightfall
Torment Unto Death – conal AoE tankbuster giving a vulnerability debuff. Use invulnerability or swap tanks after (6:32 of video)
Note: Supreme Selenomancy until Torment Unto Death will repeat until you reach a certain HP amount
Perilune/ Antitwilight
PHASE 4
Note: the next two attacks will be a combination of her 1.) Moon Alignment as shown in the animation and text on screen and 2.) Blade Type as shown in her casting bar
Moon Alignment (8:22 of video)
- Light of the Full Moon – AoE near the boss after Blade. Move away from her to dodge
- Darkness of the New Moon – AoE away from the boss after Blade. Move near her hitbox to dodge
Blade Type (8:25 of video)
- Dark Blade – AoE on the right half of the arena. Go to the left half to dodge
- Bright Blade – AoE on the left half of the arena. Go to the right half to dodge
So for example-
Light Alignment + Dark Blade = run to the left side of the arena away from the boss
Dark Alignment + Bright Blade = move to the right side of the arena while near her hitbox
Note: You can think of ‘Bright’ as ‘you need to go to the right’
Reprimand
3rd Moon Alignment
Zashiki Asobi 2 + Lunacy (8:59 of video)
- Zashiki Asobi 2 – fans will spawn in a circular fashion around the arena, starting at the center
- Lunacy – multiple shareable AoE that increases its hits the more times it is cast. The first cast is two hits, second cast later on is three, etc. a.k.a. Akh Morn
How to handle Zashiki Asobi 2 + Lunacy:
Everyone should stand where the last fan will spawn, share the AoE there, and run to the center when the area becomes safe, at the same time sharing the second AoE
Moon Attack (3rd Alignment) + Blade Combo
Torment Unto Death
4th Moon Alignment
Zashiki Asobi 1 + Hegatsu (9:38 of video)
- Hegatsu – one random tank, one random healer, one random DPS will be marked to drop a small AoE around them while Zashiki Asobi 1 is happening
How to Handle:
You can assign positions- the three marked can spread out in the left, middle and right of the safe 1/3 area to drop their Hegatsu (tank can eat the fans), and then everyone proceed to the 2/3 area when it becomes safe. Players without markers can get hit by Hegatsu once but not twice so avoid stacking
Moon Attack (4th Alignment) + Blade Combo
Reprimand
Reprimand
5th Moon Alignment
Zashiki Asobi Combination (Lunacy or Hegatsu)
Moon Attack (5th Alignment) + Blade Combo
Torment Unto Death
6th Moon Alignment
Zashiki Asobi Combination (Lunacy or Hegatsu)
Moon Attack (6th Alignment) + Blade Combo
Torment Unto Death
Lunacy
Enrage
MACRO
Japanese
/p ■ 宵の早替え
/p 銃: ボス背面 (頭割り)
/p 槍: 散開
/p A
/p \ T / (正面:北)
/p D H ☆ H B
/p / D \
/p C
/p ■ 雑魚フェーズ
/p 遠隔兵:MT 近接兵:ST
/p ■ 隕石
/p T: A(狭い方)
/p H: B or D(広い方)
/p D: C (狭い方)
/p 扇範囲 D T H
English
/p ■ NIGHTFALL
/p Gun: back of boss
/p Spear: divide
/p A
/p \ T / (A = North)
/p B H ☆ H D
/p / D \
/p C
/p ■ ADDS
/p Ranged:MT Melee:ST
/p ■ METEOR
/p T: A(narrower)
/p H: B or D(broader)
/p D: C (narrower)
/p Hegatsu Fan D T H